Enlightened Corner
  • Home
  • About
    • A little about me...
    • Research Interests
  • For Teachers
    • Recommended Articles
    • Recommended Books
    • My TPT Store
    • Websites & Blogs
    • Youtube
  • For Parents
    • Recommended Resources
    • To Parents From Parents
  • Blog
  • Online Portfolio
    • Artifacts: Domain 1
    • Artifacts: Domain 2
    • Artifacts: Domain 3
    • Artifacts: Domain 4

Making Paper

5/17/2017

0 Comments

 
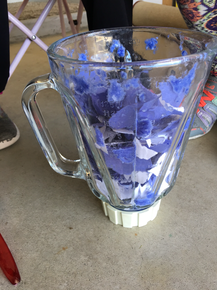
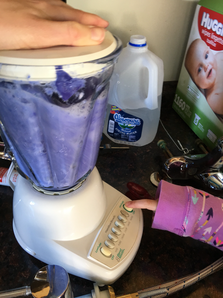
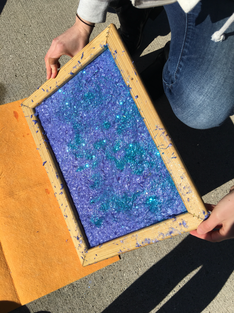
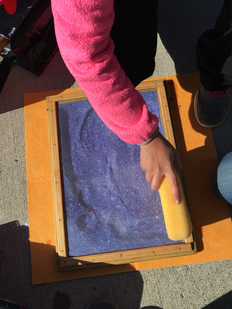
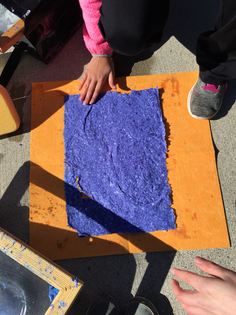
As a learning coach, I asked the girls I work with what they wanted to learn more about. The request paper! They wanted to find out how paper is made. To begin our journey, we watched a youtube video from National Geographic Kids. It was all about how paper is made.
After the video, we researched any lingering questions the girls had on how paper was made. Then we set off to make paper for ourselves! Below are the steps we took to make paper - along with some tips from our experience. 
Picture
Step 1: Rip paper or fill blender with shredded paper. Tip: If you rip paper, like I did, use 4 sheets of white and 1 sheet of colored paper to fill the blender. If you want your paper to have a specific color, add some colored construction paper.

Step 2: Add water to blender. Fill blender till it covers all the paper.
Picture
​
Step 3: Blend the paper and water into a fine pulp. Using a spoon to check the mixture is helpful.
​
Step 4: Get a large tub (I got mine at Home Depot) and fill with pulp. Use 4 blenders full to make 2 large pieces of paper. 

Picture
Step 5: Add water to the pulp. We added 1 and ½ gallons to the pulp in the tub.
​
Step 6: Dip your screen into the pulp/water mixture, and allow a thin even layer of pulp to coat the screen. (Tip: Putting the screen into the tub at an angle helps to collect more pulp.)

Picture

Step 7: Lift the screen and allow the water to drain over the tub.
​
Step 8:  Use a sponge and carefully press out the remaining water on the top. Be very careful because the sponge can easily pick up the pulp. 

Picture
Step 9: If you want, add glitter or another type of topping to the paper, when damp.

​
Picture

Step 10: Use a piece of felt and flip the frame over so it is upside down. Then use the sponge to carefully separate the paper from the screen. You may also use your fingers and carefully tap the back of the frame. 
Picture
Step 11: Let your paper dry in the sunshine or in a dry place. Should take 24 hours to dry.
​ Extra directions: My father made the frames for us. He used pieces of screen and stapled them to the wood frame while adding extra support to hold the screen in place.
Picture
It was a messy time but a FUN time! The girls loved it and were very excited about their paper! 

Until next time,
​Jackie
0 Comments


Leave a Reply.

    Archives

    July 2020
    April 2020
    June 2019
    December 2018
    April 2018
    February 2018
    January 2018
    December 2017
    October 2017
    September 2017
    August 2017
    July 2017
    June 2017
    May 2017
    April 2017
    March 2017
    January 2017

    Categories

    All
    ADHD
    Anxiety
    Art
    Behavior
    Blogging
    Building
    Buildingtrust
    Child Development
    Circleoftrust
    Classroommanagement
    Compliant
    Continuum
    Creativity
    Cultureofthinking
    Depression
    Designprocess
    Development
    Documentation
    Elementary Teacher
    Encouragement
    Engagement
    Engineering
    Environment
    Exploration
    Goals
    Growth
    Growthmindset
    Guidedreading
    #IMMOOC
    Innovator
    Innovatorsmindset
    Inquiry
    Iteachtoo
    K-3
    Kagan
    Learning
    Learningprocess
    Lifelonglearning
    Medication
    Mess
    #mindset
    Newthought
    Organization
    Overmedicating
    Play
    Playbased
    Positive
    #positivethinking
    Processnotproduct
    Questioning
    Readers
    Readingworkshop
    Saving
    Schoolvslearning
    Science
    Sciencearea
    Sharing
    Smallthings
    Socialemotional
    Socialemotionlearning
    Steppingout
    Storage
    Thinkingroutines
    Tinkering
    Tips
    Trust
    Tryingnewthings
    Wonderwall
    Young5s

    RSS Feed

© COPYRIGHT 2015. ALL RIGHTS RESERVED.
  • Home
  • About
    • A little about me...
    • Research Interests
  • For Teachers
    • Recommended Articles
    • Recommended Books
    • My TPT Store
    • Websites & Blogs
    • Youtube
  • For Parents
    • Recommended Resources
    • To Parents From Parents
  • Blog
  • Online Portfolio
    • Artifacts: Domain 1
    • Artifacts: Domain 2
    • Artifacts: Domain 3
    • Artifacts: Domain 4